You can goldfarm on your PC if you run a small farm and don’t mind leaving it on 24/7, but when you decide to scale up you will need some servers to run all the accounts. Servers are difficult to configure, so you should either look for pre-configured servers or hire a programmer to do this for you. Once the setup is complete, you should receive VNC credentials, in the form of username, password, IP address and a port (usually 5901).
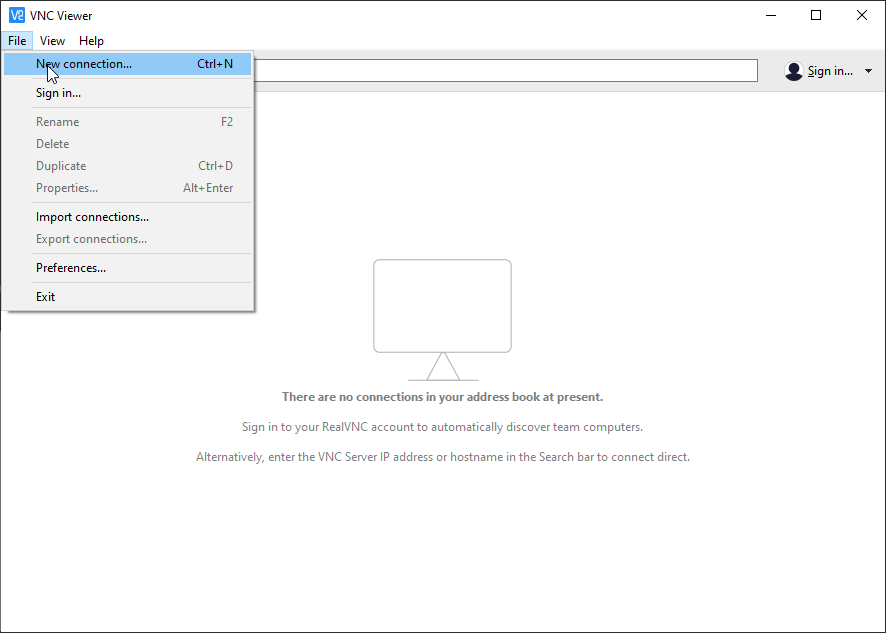
There are many VNC clients you can use, they all should work the same but we recommend VNC Viewer. Once you have installed VNC viewer, open the application and create a new connection (under File menu).
Enter the server credentials you receive via email in the popup window that appears. It’s usually in the format IP:5901, and you can optionally give the server a name so you can easily identify it if you plan to get many servers later on.
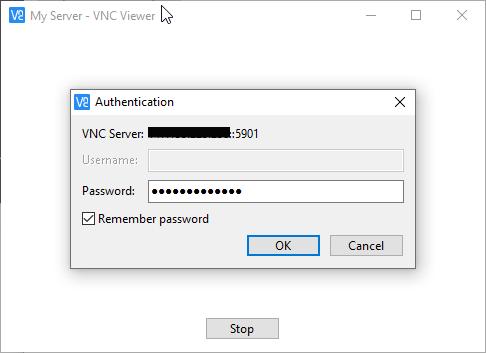
After the connection is created, double click on it or right click and choose “Connect”. You will be prompted to enter the VNC password you received. Tick the remember password checkbox so you don’t have to do this every time and click “OK”.
The server desktop will be displayed, similar to teamviewer. There are some image quality options at the top if you want to adjust it. Lower quality generally improves speed. You don’t have to worry if it looks a little laggy, the server itself is not lagging, it’s only the image.
You can also use VNC viewer from your phone/tablet to manage your farm on-the-go. You will find the application in both Google Play and Apple Store and works the same way the desktop one does.
All you have to do is add them to OSBot like this on the boot interface, under the second tab.
By design, the option to use proxies is only available with the stealth injection mode. If you would like to use proxies with the mirror mode client, you would have to use our bot manager tool, which employs proxifier to assign proxies.
Using proxies with the Bot Manager
Simply click on ‘Data’ and copy and paste your proxy credentials. Then, from the main dashboard, you can assign your bot its respective proxy, world, task, etc.
Using proxies in the browser
This method will not work in most cases, as Jagex is blocking website interactions on proxies and VPN’s.
This can be done with any browser, but you will require some plugins since common browsers like Firefox or Chrome do not support SOCKS5 proxies out of the box. I recommend you try Maxthon browser instead, this one has built-in SOCKS5 proxy support. The proxy setup process is outlined below. Make sure you have an older version of maxthon. The latest one does not support proxies. Also, there is a big chance the proxy may get blocked by Incapsula (error 15). This is NOT an issue with the proxy hence you can use it inside the botting client without issues. To bypass error 15 use our bot manager, it creates the accounts automatically in the cloud on a pool of 1m+ IP’s. Alternatively, you can use your mobile data.
If you want to give Maxthon a try:
1. Open the settings tab
2. Go to advanced section
3. Scroll down to the proxy part and select use custom proxy setting
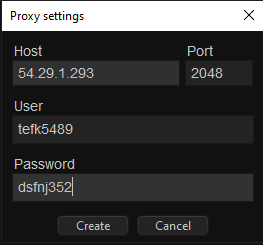
4. Click add and fill in the proxy credentials as you received them (the name can be anything)
5. Make sure all settings are correct like in the picture below
6. Open a new tab and check the proxy is working with whatismyipaddress
Using proxifier
Proxifier can be used to apply SOCKS5 proxies system-wide, or to specific applications. OSBot has built-in proxy settings, but these do not work with mirror mode. Proxifier can be used in this case to apply the proxy to both the mirror client and the attached OSRS client.
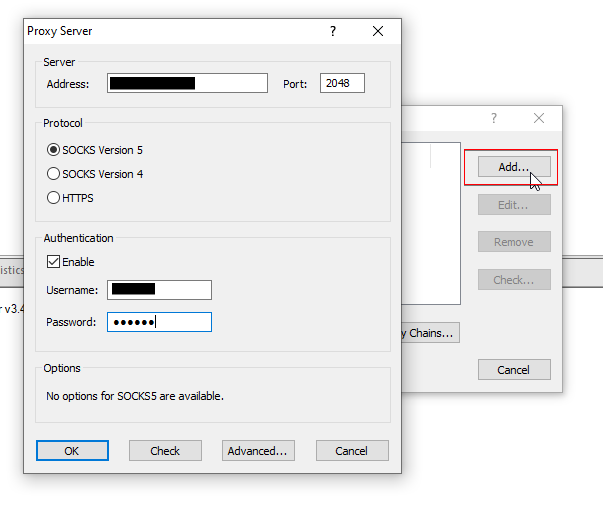
1. Open proxifier and go to proxy servers
2. Add a new proxy server and fill in the proxy credentials
3. Press check and start testing to make sure the credentials are correct
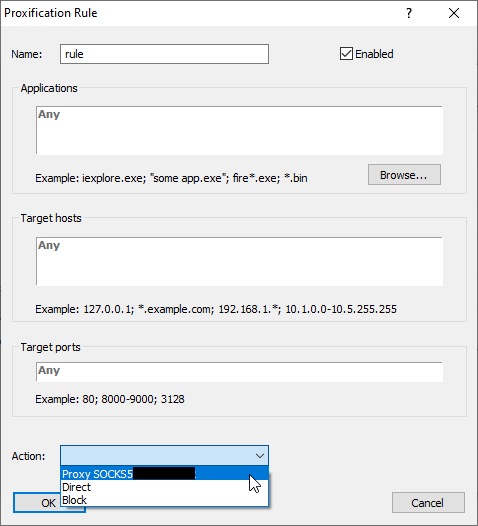
4. Add a new proxification rule
5. Give the rule whatever name you want, and specify if you want it to apply only to some applications (by default it applies to all), then select the proxy from the drop down menu at the bottom next to action
6. Make sure the rule is enabled and settings are correct
Scripts are what sets a botting client apart from the official OSRS client. They control the behavior of the player and dictate what it should do, e.g. fishing, killing zulrah, doing tutorial island, etc.
The SDN (Script Delivery Network) is an online repository of scripts maintained by OSBot for its users. The network is managed by Token, who monitors and checks every script to ensure safety and quality for its users. The SDN contains 3 types of scripts: free, VIP+ and premium. In addition to this, you may also encounter private scripts but those are not on the SDN, and not regulated by OSBot staff.
Free scripts are free to use. They are generally written by new scripters, as part of their official scripter application. These usually provide only basic tools for botting.
VIP+ scripts are similar to the free scripts. The only difference is that VIP+ scripts can only be used by VIP and sponsor members on OSBot. This restriction sometimes translates to lower ban rates due to less usage.
Premium scripts are what you should aim to use. There is a broad range of premium scripts available on OSBot ranging from simple scripts (e.g. cooking, pest control, combat) to high end content (e.g. zulrah, vorkath, barrows, firecape) and complex activities (e.g. quests, slayer, diaries).
Private scripts are the most flexible choice with similar quality to premium scripts (depends on the scripter who writes them) but they come with a much higher price. While premium scripts can be found for most common activities for $5 to $30, private scripts are customizable, with many possible features, and usually fall in the $25 to $1000 range.
What should I use?
That depends on your goals, commitment and budget, but for 99% cases, the best option is premium scripts. They have a very good price to quality ratio and suit most needs, whether you are a casual botter training a few accounts, or a hardcore goldfarmer aiming for $10k+/month.
for free scripts, simply click “Add” and the script will show up in the client (refresh the script selector for it to show up)
for premium scripts, click “Buy”, you will be redirected to the shop to complete the purchase. The script will be automatically added to your account after purchase (refresh the script selector for it to show up)
2. Private (local) script
download the script jar file
move the jar file to the OSBot scripts directory located at C:\Users\<USER>\OSBot\Scripts\
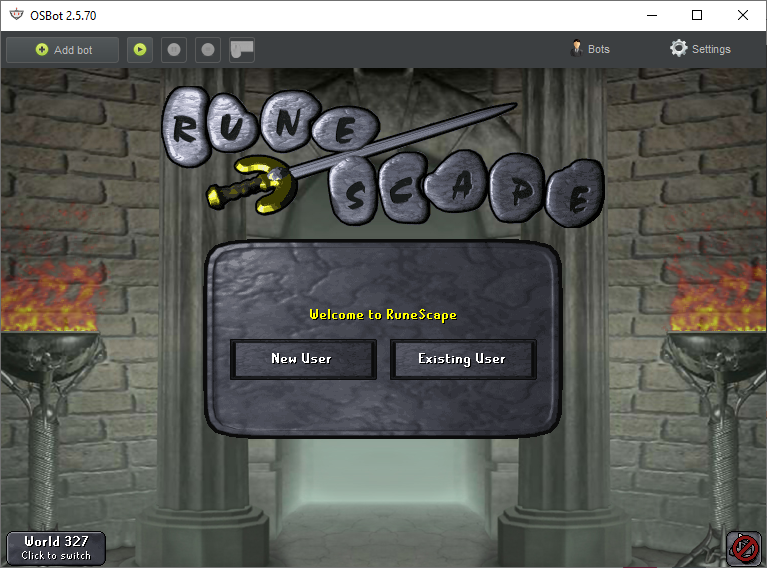
There are multiple botting clients available for OSRS, we will work with OSBot because it has been by far the best since 2013. In order to begin, you will have to sign up for an OSBot account here and then download the client from here. The OSBot client is a .jar file, therefore it requires Java to run (see previous section for instructions on how to install Java 8).
Running the OSBot Client
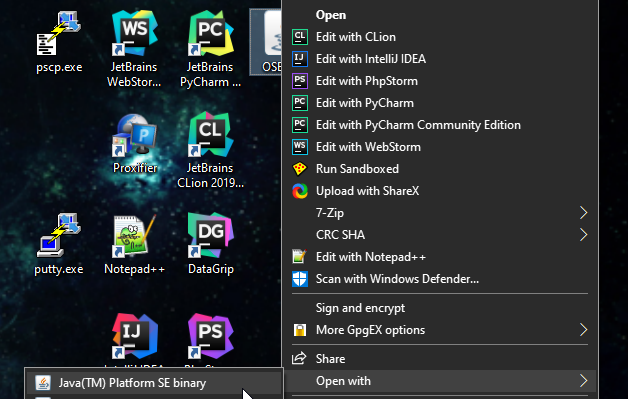
1. Move the file to desktop for your convenience
2. Right click -> Open with -> Java(TM) Platform SE binary (choose another application if it is not there)
3. Enter your OSBot username and password and press launch (or install webwalking if prompted)
4. Click “Add bot” on top left corner
5. Type the login info for the OSRS account you want to use, save it, select it and then press continue
You can play manually using the OSBot client, or run a script as shown in the next section.
Java is one of the most popular programming languages in the world, used for many applications including games. In order to start botting you have to install Java. This is already included in the official client and does not need a separate installation, but you will have to install it for botting clients. Before installation Java 8,make sure that you do not have any other Java versions already installed on your PC. You can download Java 8 here.
You will need to create an Oracle account in order to download it. Do not download any Java version other than 8. After installing it, you should be able to open applications with Java.
Verifying Java installation
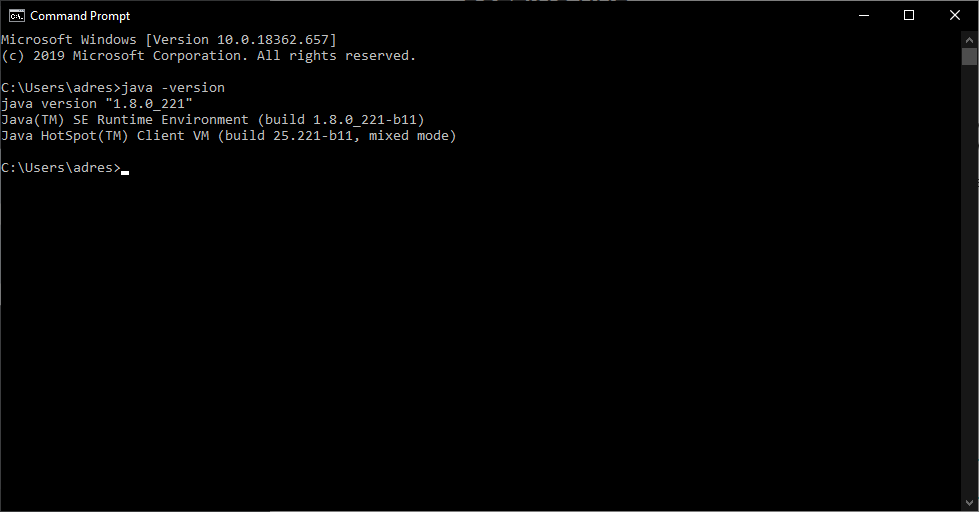
1. Open a command prompt
2. Execute the command “java -version”
If the java version is 1.8.0_xxx then your Java installation is correct, otherwise you will have to remove all other Java versions and only after that install Java 8.